Save Editor
The save editor panel is dedicated to saving materials in the User Library, the user Library is a Library of Extreme PBR which will initially be empty, but you can populate it with the materials created with Extreme PBR, so that you can reuse them in the future directly from the Extreme PBR interface.
This process will also save the material preview, so you can see it in the library.

Note
In order to correctly display the panel, you must be positioned on the User Library, otherwise not all tools will be visible.
Render Quality
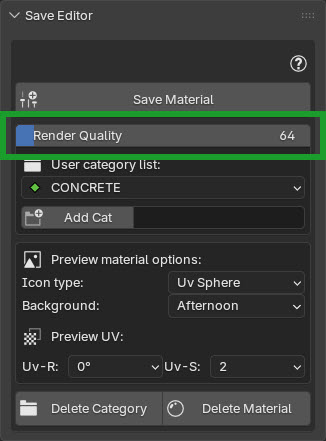
From this menu slider you can choose the rendering quality, the higher the rendering quality, the more precise and quality the rendering will be, but also slower. The default value is 64.
Save Material

By pressing the Save Material button a dialog box will open where you can choose:
Preview with Displace
If active and if the material has a displace in the nodes, it will be applied to the material before rendering the preview
Use Watermark
Case where you are saving a material: Icon “Material”
Case where you are saving a group (Module): Icon “Node Group”
Displace Strength
Here you decide the strength of the displace to be applied to the material before rendering the preview
Preview with Bloom
If active, a Bloom effect will be applied to the final render, useful for materials that have emissive parts
Use asset props
If the material is present in the asset browser, save the author the tags and description
Bloom Strength
If the Bloom is active, here you can decide the strength of the Bloom, the higher the value, the more intense the Bloom will be.
Material Name
Here you can enter the name of the material on the fly, by default it will be the name of the material of the project.
Save Module
Note
Save Module Nexus, this button appears only if the material has been created in Nexus mode: Material Type

All the settings of the Popup panel are practically identical to those of the Save Material button described here Save Material
User Category List
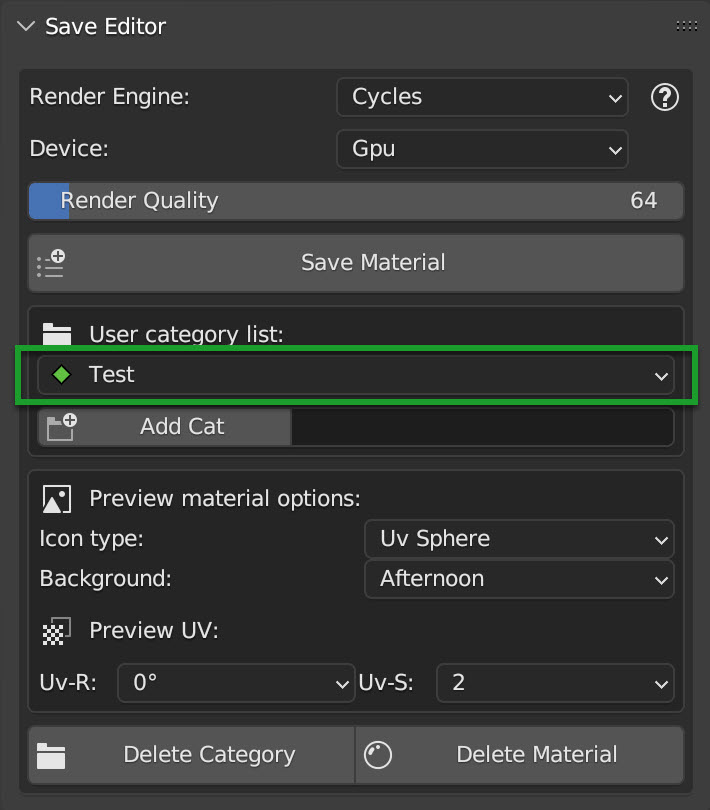
Here you can choose in which category to save the material. If there is not even 1, you will have to create a new one following the instructions just below.
Add Cat
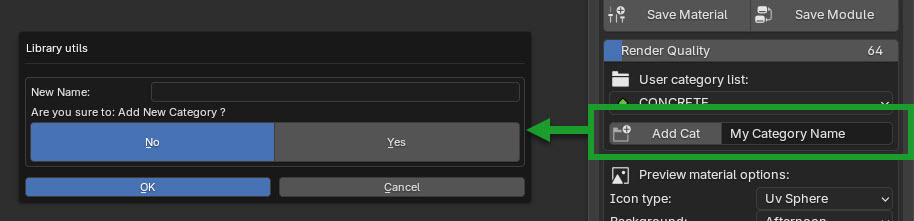
By this button, you can create new categories, for example Wood, Metal, Plastic etc etc. this allows you to have an organized and orderly library.
Make sure to enter a name in the text box next to it.
Note
Attention to the names of the categories, uppercase / lowercase, My Cat is the equivalent of my cat or MY CAT So it will not be possible to create 2 categories with the same name but with different uppercase and lowercase letters.
Icon Type
From this menu you can choose the type of geometry on which the material will be applied to render the icon, you can choose between:
Sphere: A sphere
Plane: A Vertical plane
Uv Sphere: A UV sphere
Cube: A cube
Shader Ball: A sphere with a shader ball model
Monkey: A sphere with a Blender monkey model (Suzanne)
Road: A road with curves
Car Shape: A model with a car body shape
Square: A square
Low Poly Sphere: A Low Poly sphere
Cone: A cone
Background

From this menu you can choose the environment to use lighting, it will be an HDR that will act as a light for the material to be rendered
UV Rotation

From this menu you can change the rotation of the UV mapping to be applied to the object, so this allows you to rotate the image applied to the object to be rendered.
UV Scale
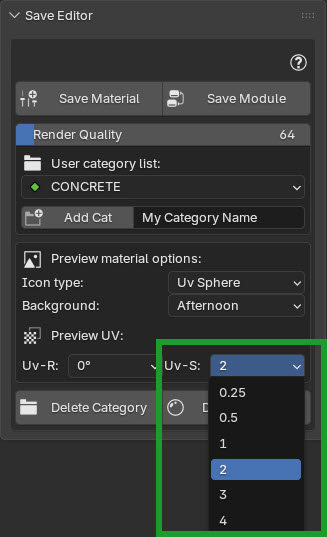
From this menu you can change the scale of the UV mapping to be applied to the object, so this allows you to scale the image applied to the object to be rendered.
Delete Category
Danger
Attention, all the materials contained in this category will be deleted with it. The action is not reversible

Delete the category User Category List selected. and all the materials contained in it.
Delete Material
Danger
Attention, the action is not reversible

Delete definitively the active material in the material_browser, the action is not reversible.
Something went wrong, press this button
In this case, you are in the scene where the material was saved, press the button to remove the scene that was created to save the material to resolve the situation.

The button will delete the scene and take you back to the scene you were working on. This situation may rarely occur, but in case it occurs, this button will allow you to resolve the situation.